It’s nice to have a cool meal that’s easy to make in the heat of the summer, and hiyashi chuka is just that: cold ramen with a cold sauce. Literally translated to “cold Chinese noodles,” it’s also sometimes referred to as Japanese cold ramen salad.
A Japanese restaurant reportedly developed it in 1937. Why? Most of Japan gets really hot and humid in the summer, causing sales of traditional ramen to drop during hot season. Enter, the cold ramen option, and sales begin to rise. Like just about everything, it’s all about the money.
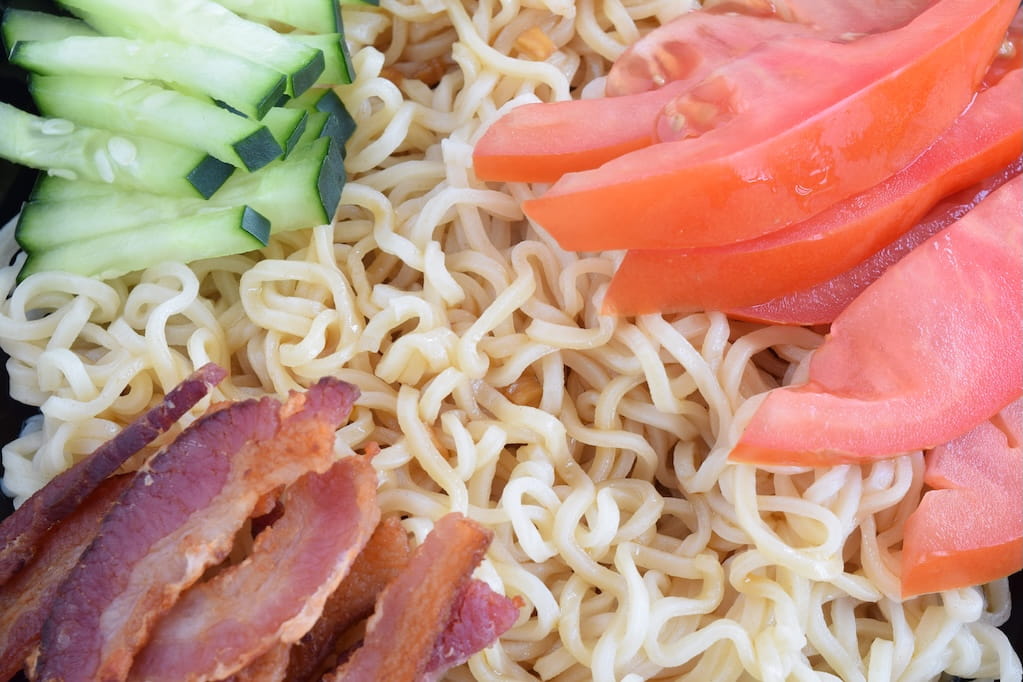
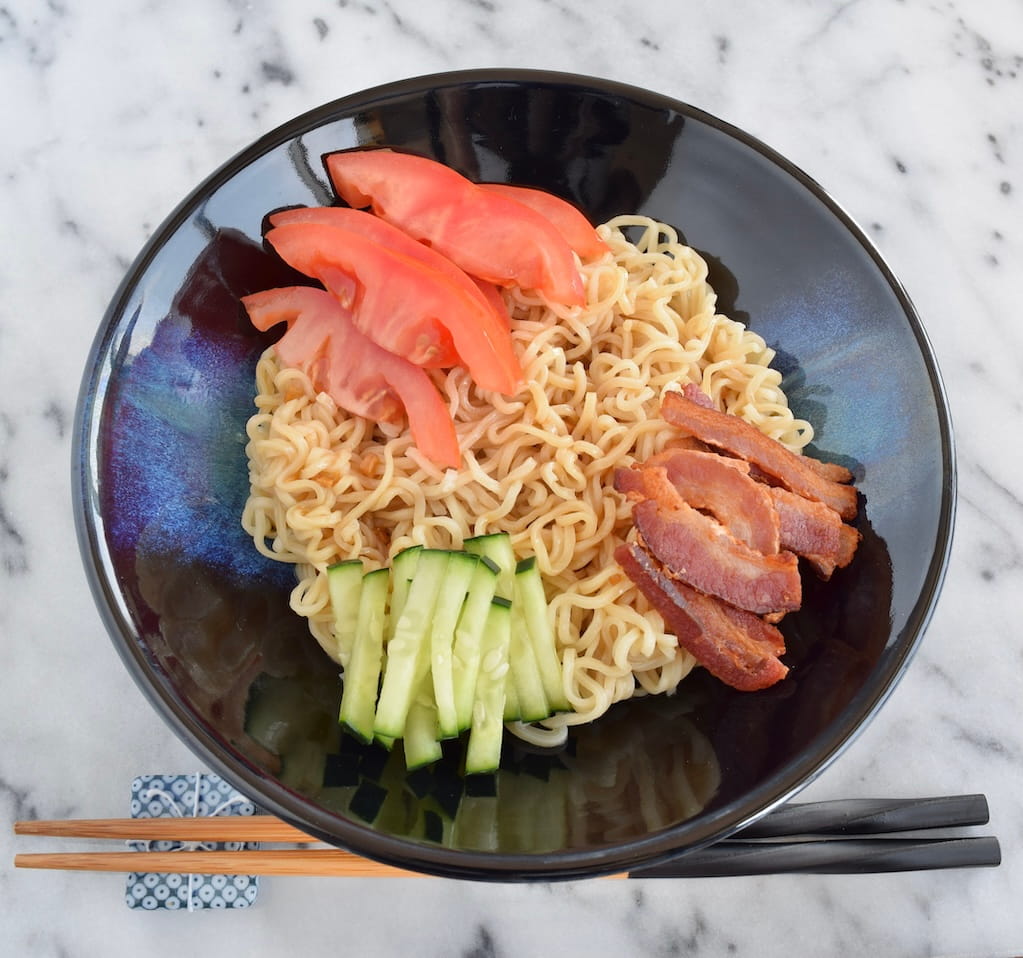
There are a variety of toppings you can add to this dish. I’ll present some here, but if you look online, you can find a lot more options. For example, I used the traditional tomatoes and cucumbers but added non-traditional bacon, which goes well with the noodles and sauce. Other traditional options include egg, strips of ham, small shrimp or surimi. Foods with a variety of colors will deliver a nice presentation, such as green onions, strips of nori, beni shoga or even strips of yellow, red or green onions.
Some people bury the noodles under many toppings, and that’s up to individual tastes. I prefer the noodles and sauce to be the stars of the show, so I go lighter on the toppings. However you make it, I’m sure it will be delicious.
What you’ll need for the noodles
- Per-serving: 4 oz dried ramen noodles or equivalent of fresh Asian wheat or ramen noodles, cooked and rinsed in cold water
- Your chosen toppings, sliced and ready to use
- A portion of the cold ramen sauce
- Sesame seeds (optional topping)
What you’ll need for the sauce
- 4T (0.25 cups) soy sauce
- 3T unseasoned rice vinegar
- 2T stock or broth (or substitute water)
- 1.5T sugar
- 1T water
- 1T mirin or sake
- 1t sesame oil (don’t omit, it’s key to the flavor)
- 0.75t grated ginger
- 0.5t ra-yu (Japanese hot oil) or another chili oil (optional)
What to do for the sauce
Mix all the ingredients in a small bowl, ensuring the sugar completely dissolves. Immediately put in the refrigerator until you’re ready to use it.
What to do for the noodles
Presuming you’ve cooked, drained and rinsed the noodles with cold water, add a serving of noodles to a shallow bowl or a small plate with edges. Arrange the toppings in sections over the noodles, then pour a portion of the sauce evenly across the noodles in a spiral motion. Sprinkle with sesame seeds, if using, and serve cold.